
Why Your Outfit Videos Look Flat — and What Fixed Mine
Last fall I put together an outfit I was genuinely proud of. A rust-colored slip dress, a slouchy knee-high boot, one of those oversized cardigans you sort of disappear into. In the mirror it looked exactly the way I wanted it to: warm, a little moody, expensive without trying too hard.
So I filmed it. Propped my phone on the dresser, hit record, did the little turn you do.
Then I played it back, and my stomach dropped a bit. The dress read brownish and dull, like a paper bag. My skin looked washed out and faintly yellow. The whole frame was crooked because the phone was leaning against a candle, and it wobbled every single time I shifted my weight. Same dress. Same me. Same apartment. Totally different video.
For months I assumed the problem was me. That I wasn’t photogenic enough, or my phone was too old, or I just didn’t have whatever it is that makes other people’s Reels look so effortless and polished. I’d scroll through creators who filmed in what looked like the exact same kind of small apartment I have, and theirs glowed. Mine looked like a security-camera still. It was demoralizing, honestly.
None of it turned out to be true. My outfits were fine. My face was fine. The problem was my setup, and it was fixable for less than the cost of the dress I was trying to show off. Here’s exactly what changed things, in the order that mattered.
Your outfits are fine. Your setup is the problem.
Let me save you the months I wasted blaming the wrong things.
When an outfit video looks “off,” it’s almost never the outfit, and it’s almost never you. It comes down to two boring, unglamorous things: light and stability. Fix those two and the phone already in your hand will suddenly look like it got a serious upgrade. You don’t need a new one. I promise.
Start with light, because it’s the biggest offender by a mile. Most of us film under whatever happens to be on in the room, which usually means a ceiling fixture glowing that warm, dingy yellow. Overhead light is about the worst possible angle for a human being. It drops hard shadows straight down under your eyes, flattens out the texture of your clothes, and drags every color a shade toward murky. That gorgeous rust dress I loved? Overhead light turned it into oatmeal.
Then there’s the propping situation, and you know exactly the one I mean. You balance the phone against a stack of books, a water glass, a lipstick, a candle, whatever’s within reach on the shelf. It’s always slightly crooked. It always shows half your body or guillotines your shoes. And the moment you move, it shakes, slides, or face-plants onto the floor. So you’re either standing weirdly still to protect the shot, or you’re doing the whole thing over. Again.
Third, and this is the one people forget: you cannot hold the phone and show your whole outfit. If you’re filming handheld, you’re stuck with a chest-up shot, so nobody ever sees the boots, the hem, the way the whole thing comes together. The full look is the entire point of an outfit video, and handheld filming quietly makes it impossible.
So here’s the thesis, and I really do believe it after way too much trial and error: your phone camera is already good enough to film outfit videos people want to watch. What you’re missing isn’t a better camera. It’s better light, and something to hold the phone steady at the right height. That’s the whole game. I fixed mine with three things. You do not need all three. Start with the first one and see how far it gets you.
Fix #1: Better light (the one that mattered most)
If you change only one thing after reading this, make it your lighting. It’s the single biggest difference between “phone video” and “wait, why does hers look so good.”
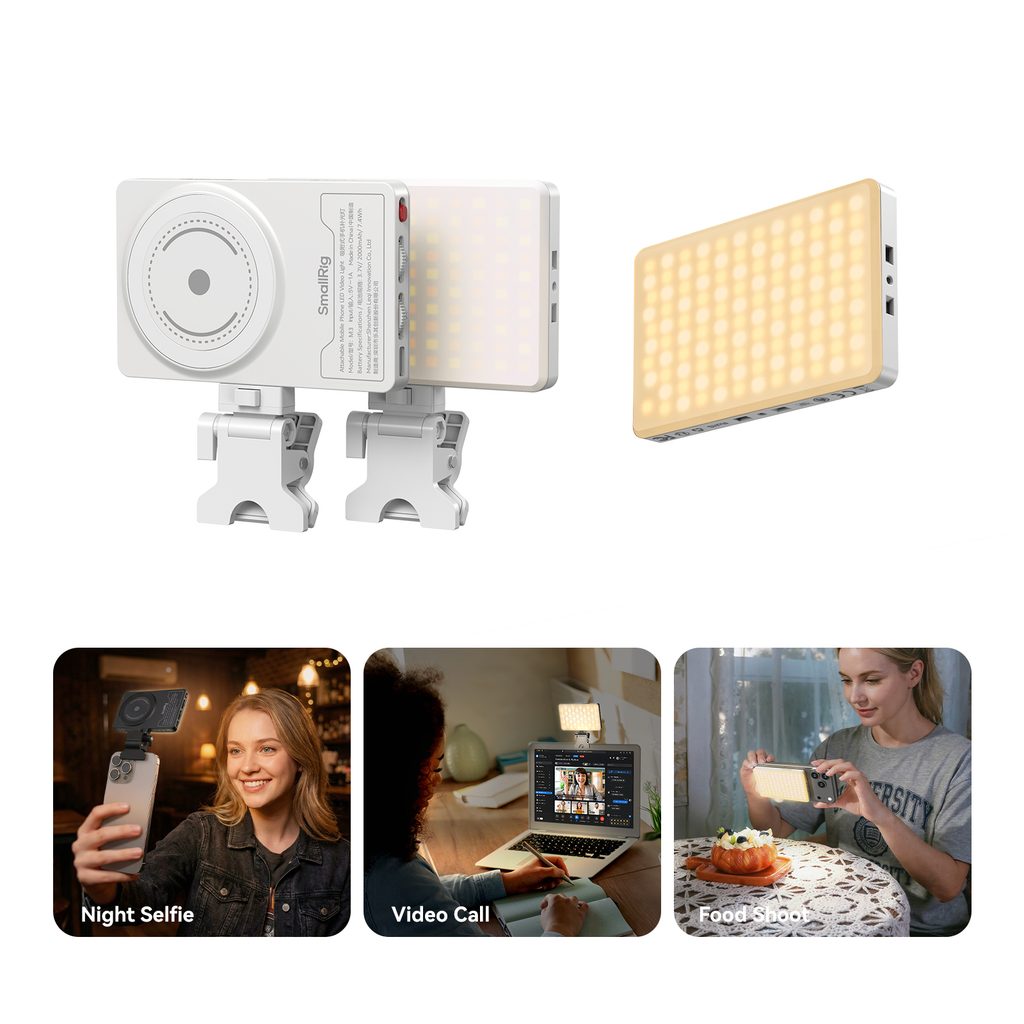
The thing I reach for is the SmallRig M3 Magnetic Selfie Phone Light, and it runs $29.99 (I’ve caught it around $19.99 on sale, so it’s worth a quick check). It’s a slim little rectangular light that snaps magnetically onto the back of your phone, so it throws soft, even light right onto your face and the front of your outfit. No stand. No cords. No twenty-minute setup. You turn it on, and that’s the entire process.
What actually sold me was the color temperature dial. It runs from a warm 2700K all the way to a cool 6500K, which in normal-person terms means you can match your light to the vibe you’re going for. Warm and golden for cozy fall looks and evening content. Cooler and truer for a haul where people genuinely need to see the real color of the thing you’re holding up. There are brightness levels too, so you’re not blasting yourself into a ghost.
The first time I refilmed the rust dress with this thing snapped on, the color came back. It looked like rust again instead of mud. My skin stopped looking sallow and started looking like skin. And I want to be clear: I didn’t touch a single filter or edit. That was straight out of the camera. I sat there replaying the two clips back to back, a little annoyed that the fix had been thirty dollars the whole time.
The other thing I love is that it’s tiny. It lives in the little zip pocket of my everyday bag, so I can film in a Zara fitting room or a hotel bathroom mirror without hauling a single extra thing. That portability is the reason it gets used instead of sitting in a drawer, which is more than I can say for half the stuff I’ve bought.
Now the honest part, because I promised you honesty. This is a fill light, not a studio. It’s fantastic for close-to-mid-range shots: mirror selfies, talking-head clips, get-ready-with-me stuff, anything where you’re within a few feet of the phone. It is not going to flood your entire bedroom with light or illuminate a full-body shot from across the room. Stand fifteen feet away and it’s barely doing anything. For what it costs, though, I think it’s the smartest first purchase you can make, and it’s the exact thing I’d press into the hands of a friend who’s just starting out.
A few lighting tricks that cost nothing
Even before you buy a single thing, you can steal some free wins:
Face your light source. Do not sit under it. A window is almost always better than a ceiling light, so turn toward the window and let it hit your face head-on. Free, flattering daylight is right there for the taking.
Kill the overhead light when you can. Mixing a warm ceiling bulb with cool window light gives you that strange two-toned look where one side of your face is orange and the other is blue. Pick one light source and commit to it.
Don’t stand with the window behind you. Backlighting turns you into a silhouette and confuses your phone’s exposure, so it either blows out the background or drops your face into shadow. Light in front, window behind the phone, you facing it.
Watch out for the yellow-bathroom trap. Bathrooms have the best mirrors and the worst light. Those warm vanity bulbs make everyone look faintly jaundiced on camera. If you have to film there, dial that little light cool to fight it.
And time of day matters more than you’d think. The soft golden light about an hour before sunset is the most forgiving light there is, on anyone. If you can film then, do.
Fix #2: Something to hold the phone (so you can film full-body, alone)

Once the light was handled, my next problem showed up every time I tried to film a head-to-toe look: I had no decent way to film myself, standing, the whole outfit in frame. You can’t hold the phone and show your full body at the same time. It’s just physics, and no amount of arm-stretching fixes it.
What solved it for me is the SmallRig Smartphone Vlog Tripod Kit VK-30, which is $43.90. It’s clever because it’s two tools in one. Collapsed, it’s a selfie stick you can hold out for walk-and-talk shots. Opened up, the base splits into three little legs and it becomes a tabletop tripod that holds your phone steady, hands-free. Folded down it’s about the size of a fat marker, so it genuinely comes everywhere with me, no debate.
The feature I use constantly is the quick portrait-to-landscape switch. The phone grip rotates, so I can flip from vertical for Reels and TikTok to horizontal for a wider try-on shot in about a second, without unscrewing anything or re-clamping the phone. If you’ve ever fumbled with a phone mount mid-shoot while your motivation drained away, you’ll appreciate this more than it sounds. It also ships with a small P96 LED light that clips right on, which is a nice bonus if you decided to skip the M3 and want one thing that does both jobs.
Here’s where I have to be straight with you, though, because it’s the caveat that’ll make or break whether you’re happy: this is a tabletop tripod, not a full-height floor stand. Sitting on the floor by itself, it films you from a low, up-the-nose angle that flatters absolutely no one. The fix is easy and free. Set it on a dresser, a kitchen counter, a stack of books, a windowsill, whatever raises it up. I keep mine on top of a shelf that happens to sit right around chest height, and that single adjustment made my full-body videos look about ten times better overnight. Just go in knowing you’ll be hunting for a surface at the right height, or you’ll want to grab an inexpensive full-height phone stand down the line if you’re after true floor-to-ceiling framing.
For forty-four dollars, though, it nails the two things I needed most: it holds the phone dead still, and it lets me film an entire outfit, by myself, with both hands free. If you’re going to own one piece of gear on this whole list, this is probably the one for most people.
How to frame a full-body outfit shot by yourself
Getting the gear is only half of it. Here’s what actually makes the shot look right:
Set the phone at roughly chest or hip height, aimed straight ahead, not down at your feet. Filming from below stretches everything out strangely and gives you that unfortunate up-the-nose thing. Around your midsection, level, keeps your proportions looking like your actual proportions.
Leave a sliver of headroom, and please, show your shoes. The number one mistake I see in outfit videos, over and over, is the frame cutting off at the ankles. The shoes finish the look. Frame so there’s a little space above your head and your full foot is in the shot, top to toe.
Mark your spot. This sounds fussy, but it’s the best trick I’ve got. Put a small piece of tape on the floor where you need to stand so you land in frame every time, instead of doing that awkward shuffle-forward-check-the-screen-shuffle-back dance while you’re supposed to be looking cute.
Shoot a three-second test first. Record, walk to your mark, glance at the playback. Ten seconds of checking saves you from filming a flawless take that turns out to be half off-screen.
And film vertically for Reels and TikTok. I know landscape feels more cinematic, but the platforms want portrait, and cropping a horizontal video down later always chops off something you wanted.
Fix #3: The all-in-one kit (only if you’re getting serious)
This is the one I want you to think hardest about before you buy, because it’s the biggest jump in both price and size, and plenty of people honestly don’t need it. I’d rather talk you out of it than watch it gather dust on your shelf.
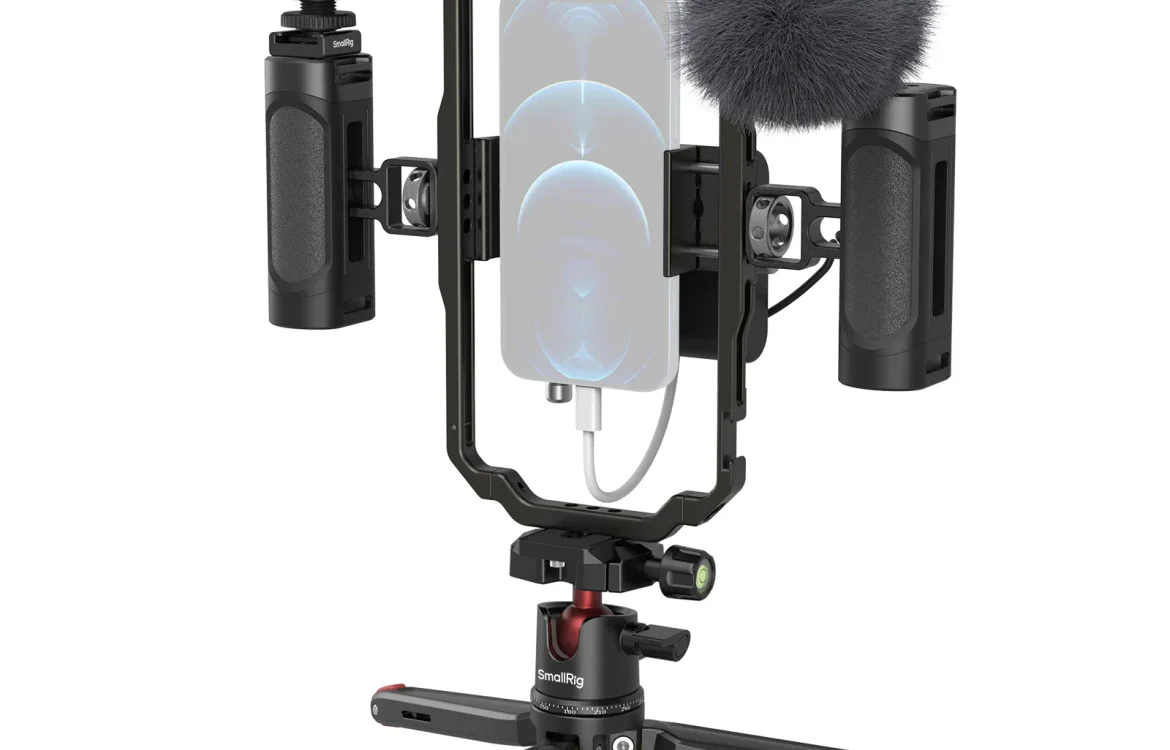
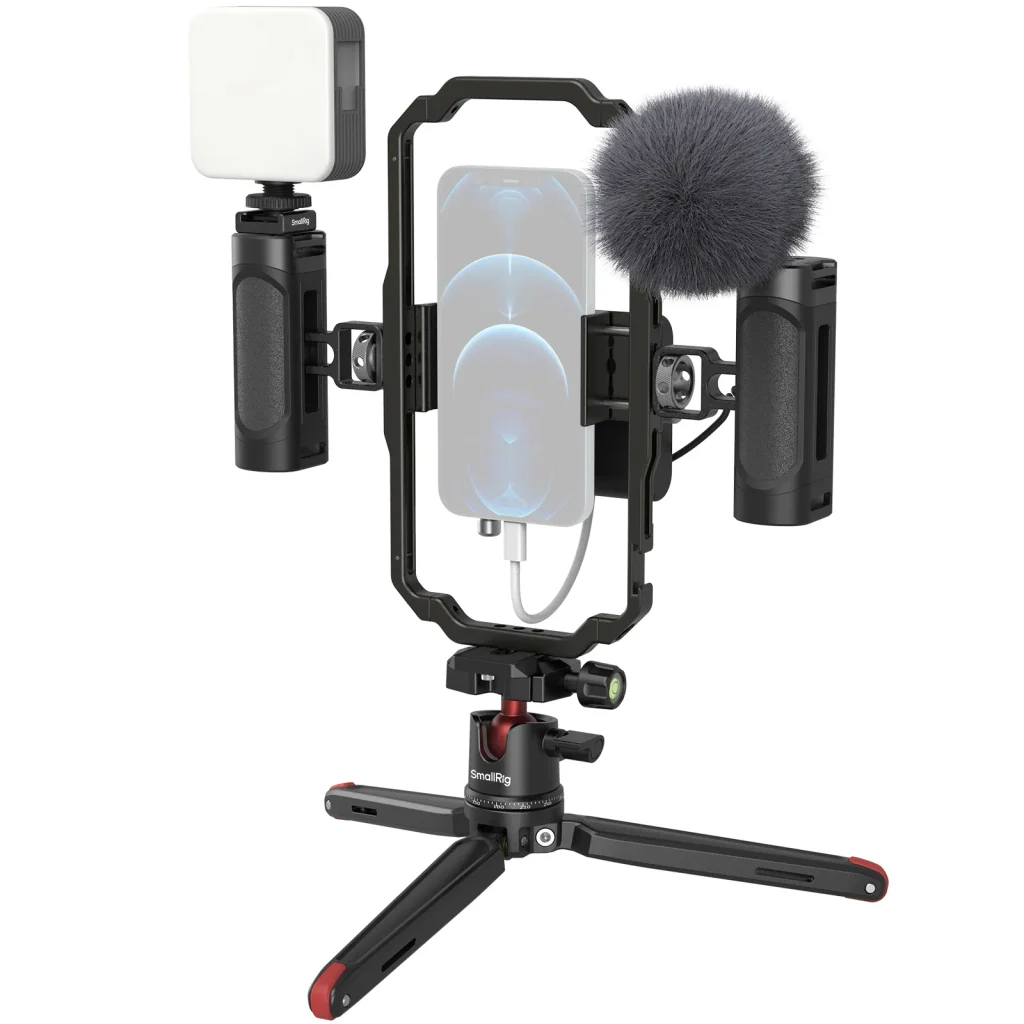
But if you’ve crossed over from “I post an outfit every now and then” into “okay, this is kind of my thing now,” the SmallRig Professional Phone Video Rig Kit 3384B is the upgrade. It’s around $169.99, and it’s basically a full content setup in one box: a cage that grips your phone, a mini LED light, a microphone, two side handles, a desktop tripod, and a power-bank holder so your phone doesn’t die halfway through a shoot.
The two things that earn back the price are sound and stability. That included mic is a real step up from your phone’s built-in one, and it matters the second you start talking to camera. Phone mics grab the whole room equally: the traffic, the fridge hum, the neighbor’s TV, you. A proper little directional mic points at you and pushes the background down where it belongs. If you do voiceovers or talk viewers through your outfits, the difference is not subtle, and it’s the kind of thing people can’t name but can feel. “Her videos just sound more professional.” That’s the mic.
The side handles are the other quiet win. They make handheld shots dramatically steadier, so if you’re the type to film a “come thrift with me” or a walking outfit-of-the-day around the block, it actually stays smooth instead of doing that seasick bounce. And the power-bank holder sounds boring until you’re forty minutes into a shoot at eight percent battery, silently negotiating with your phone.
Here’s the honest caveat, and it’s the important one: this is overkill for casual posting. It’s bigger, it’s heavier, and it costs more than the other two combined. If you’re filming a mirror clip twice a month, you do not need this, and I would genuinely feel bad if you bought it on a whim. But if you’re posting several times a week, selling something, or building an actual channel with some momentum behind it, this is where I’d put the money. Buy it when your volume justifies it. Not a day before.
So which one do you actually need?
Let me make this simple, because I don’t want you to overthink it or overspend.
Here’s the honest breakdown:
- If you fix only one thing (under $30): the M3 magnetic light at $29.99. Lighting is the biggest lever there is, and this is the cheapest one to pull.
- If you film full outfits by yourself (best for most people): the VK-30 tripod kit at $43.90. It holds the phone, doubles as a selfie stick, and throws in a light.
- If this is becoming a real thing (serious creators): the 3384B all-in-one kit at around $169.99. Better audio, sturdier handheld, the whole setup in one bag.
My real advice for a beginner? Start with the light and the tripod. Together they come to under $75, and they fix the two problems that make ninety percent of outfit videos look flat. Skip the big kit until you’re posting consistently and you feel the specific itch for better sound. There’s no prize for owning the most gear. There’s only better video, and you can get most of the way there for the price of a nice dinner out.
A few things people always ask me
Do I really need gear, or is my phone enough? Your phone is enough. The gear isn’t there to replace your camera, it’s there to fix light and stability, which are the two things your phone can’t fix on its own no matter how new it is.
What’s the best lighting for try-on videos at home? Soft, even, front-facing light. A window during the day is the free version. A small phone light like the M3 is the portable version for cloudy days, night shoots, and anywhere the sun refuses to cooperate.
How do I film full-body outfit videos by myself? Put your phone on a tripod at chest height, set it on a raised surface like a dresser or counter, mark your standing spot on the floor with a piece of tape, and film vertically. That’s honestly the entire trick.
Do these work with an iPhone and an Android? Yes. All three mount to standard phone sizes and use universal fittings, so they genuinely don’t care which team you’re on.
Will I need to learn editing too? Not to start. Good light and steady framing get you eighty percent of the way to a video that looks intentional. You can add editing later once the raw footage is already solid, which, funny enough, makes editing about ten times faster.
What’s the cheapest way to start? The M3 light at $29.99. If you can only spend on one single thing, spend it on light. Every time.
The refilm
A couple of weeks after all of this, I put the rust dress back on. Same apartment, same evening, same slightly-too-small living room.
This time I stood by the window instead of under the ceiling light. I snapped the little light onto my phone, set it on the tripod on my chest-height shelf, and marked my spot on the floor with a scrap of blue tape. Then I hit record and did the exact same turn I’d done the first time.
And this time it looked like the outfit actually felt. Warm, rich, the boots reading as boots instead of a puddle of shadow, the color finally showing up on screen the way it showed up in the mirror. Nothing about me had changed. My whole setup had.
You don’t need a studio, a giant ring-light rig, or a real budget to make your outfit videos look the way your outfits already look in real life. Start with one thing. And if you can only grab one, make it the light.
You may be interested
FL Studio Review 2026 – Must Read Before You Buy
Three of my Reels got muted last spring. Not taken...
Ultrahuman Ring PRO Review: The Only Piece of Tech That Actually Matches My Rings
I have a rule about wearable tech. If it looks...
